• Home
  • About
    • Welcome to OMT
    • Say Hello
  • DIY
  • Grub
    • Meals
    • Sweet Treats
    • Happy Hour
  • Décor
  • Lifestyle
    • Style & Beauty
    • Coffee Conversations
    • 30 Before 30
    • Entertaining
    • Travel
Our Messy Table Our Messy Table Our Messy Table Our Messy Table
  • Home
  • About
    • Welcome to OMT
    • Say Hello
  • DIY
  • Grub
    • Meals
    • Sweet Treats
    • Happy Hour
  • Décor
  • Lifestyle
    • Style & Beauty
    • Coffee Conversations
    • 30 Before 30
    • Entertaining
    • Travel

Rustic Wooden Calendar

May 24, 2016 | Posted by John | DIY | 32 comments |

Have you ever see something in the store that you love, but then see the price tag and think well I don’t love it for that price ?! Me too, all the time! And what I do in most of those situations is ask myself if I can make it myself? This was one of those situations and the answer was ‘yes I can’ and today I’m going to show you how to make a Rustic Wooden Calendar.

Rustic Wooden Calendar

Farmhouse, fixer upper, rustic, Rustic Wooden Calender, home, office, calendar, woodwork, diy, our messy table, omtcrafts

I will say the hardest part was figuring out how I was going to make those metal sliders and then out of sheer blind luck I was at Walmart and happen to look down to see a photo album that had a metal label holder on the side. Genius! But of course Walmart doesn’t sell those pieces individually, but lucky for me I live near a Hobby Lobby. Sorry that was a proud moment for me so I thought I’d share, haha. Lets get started my friends.

Materials:

  • Drill
  • Circular Saw
  • Jigsaw
  • Needle nose pliers
  • Hot glue gun
  • Glue sticks
  • Brass flat bars
  • Label Holders
  • (1) 1 x 4 common board at least 2ft long
  • (3) 1/2 in. x 2 x 2 poplar board (cut each board down from 2 ft to 1ft 8 in.)
  • (1) 1/2 in. x 3 x 2 poplar board (cut into 2 pieces of 11 1/2 in. each)
  • Wood screws
  • Wood glue
  • Sand paper
  • Wood stain
  • Letter stamps
  • Number stamps
  • Ink pad

Instructions:

Step 1: Cut all of the wood to the measurements given above.

Step 2: Lay the two side pieces flat and then line up all of the horizontal pieces to get the spacing right. Then measure 2 in. from the bottom and 2 in. in between each board, leaving 1 in. remaining on the top. I then labeled the board for my cuts.
Farmhouse, fixer upper, rustic, Rustic Wooden Calender, home, office, calendar, woodwork, diy, our messy table, omtcrafts

Using the drill make holes in each corner as shown,this will help with the corner cuts for the jigsaw. Then cut out each marked section with the jigsaw.

Farmhouse, fixer upper, rustic, Rustic Wooden Calender, home, office, calendar, woodwork, diy, our messy table, omtcrafts

Step 4: Assemble all of the pieces. Use wood glue to hold the horizontal bars in place and then screw each one to the side boards.

Step 5: Screw the side boards to the base by first drill a hole from the bottom into the side boards, then screwing them in place.

Farmhouse, fixer upper, rustic, Rustic Wooden Calender, home, office, calendar, woodwork, diy, our messy table, omtcrafts

Step 6: Using the needle nose pliers form the brass flat bars around the horizontal pieces, but not all the way yet. You want them to look like “C”s for the time being.

Farmhouse, fixer upper, rustic, Rustic Wooden Calender, home, office, calendar, woodwork, diy, our messy table, omtcrafts

Farmhouse, fixer upper, rustic, Rustic Wooden Calender, home, office, calendar, woodwork, diy, our messy table, omtcrafts

Step 7: Stain the wood

Step 8: Once the wood stain is dry, stamp the numbers on the lowest bar, then the Months on the middle bar and the days of the week on the top bar. For spacing I lined up all of the numbers then just stamped as I went.

Farmhouse, fixer upper, rustic, Rustic Wooden Calender, home, office, calendar, woodwork, diy, our messy table, omtcrafts

TIP: If you use a paper towel to wipe the edges of the stamp, you will keep yourself from get the square edges stamped on the wood as well.

Farmhouse, fixer upper, rustic, Rustic Wooden Calender, home, office, calendar, woodwork, diy, our messy table, omtcrafts

Step 9: Using the hot glue gun, glue the label holders to the back of the flat brass “C”s that we created. Then assemble them onto the horizontal boards and using the needle nose pliers again, form the flat brass all the way around the boards.

Farmhouse, fixer upper, rustic, Rustic Wooden Calender, home, office, calendar, woodwork, diy, our messy table, omtcrafts

Farmhouse, fixer upper, rustic, Rustic Wooden Calender, home, office, calendar, woodwork, diy, our messy table, omtcrafts

Farmhouse, fixer upper, rustic, Rustic Wooden Calender, home, office, calendar, woodwork, diy, our messy table, omtcrafts

Farmhouse, fixer upper, rustic, Rustic Wooden Calender, home, office, calendar, woodwork, diy, our messy table, omtcrafts

The finished wooden sliding calendar will make a great accent to any desk or study. I know that my brain works different at times so if you have any questions at all about any of the steps, please let me know in the comments and I’ll do the best I can to help you out. Good luck and we’d love to see some of the finished products so be sure to tag those pics with #omtcrafts.

OMT_rusticcalendar

John lindsey

POPULAR POSTS

2015 Christmas Home Tour Part 1

Dec 25, 2015

  SONY DSC Merry Christmas, Y'all! John and I had so much fun decorating our new home for Christmas this year! Hope you enjoy these snap shots of our decorations.

Spring Home Tour 2016

Mar 23, 2016

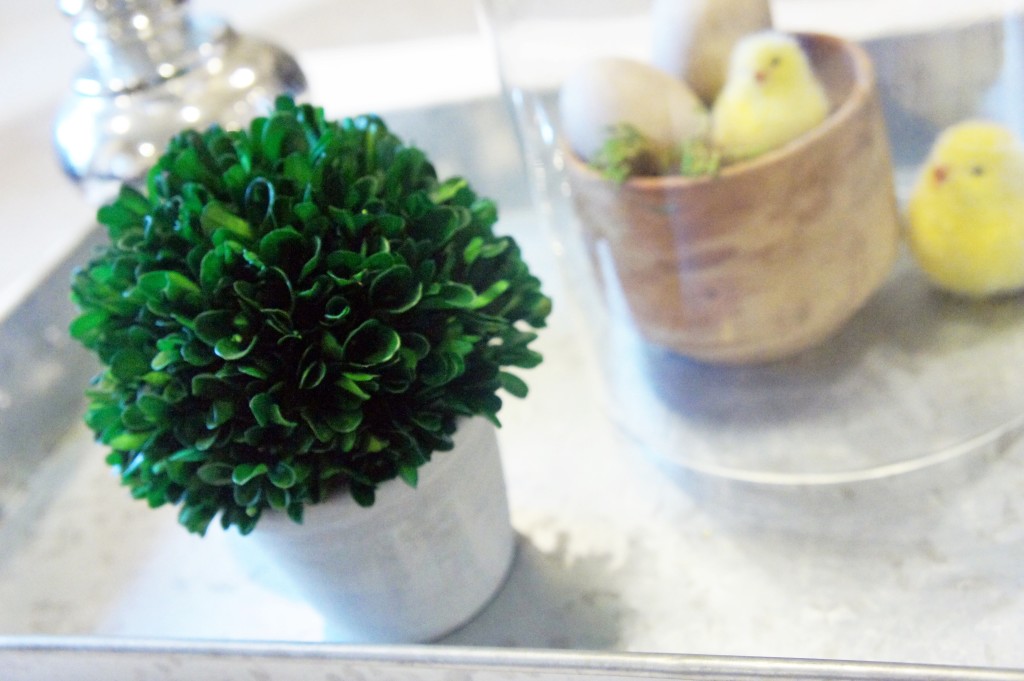
I love Spring. I love the new, the fresh, the clean, all of it. I also enjoy the chance to decorate our house again and give it a new look. If you are in need of some Spring decor inspiration or just want to see what we have going on over at the Lyons' house then this post is for you.  

Emoji Mason Jars

Apr 19, 2016

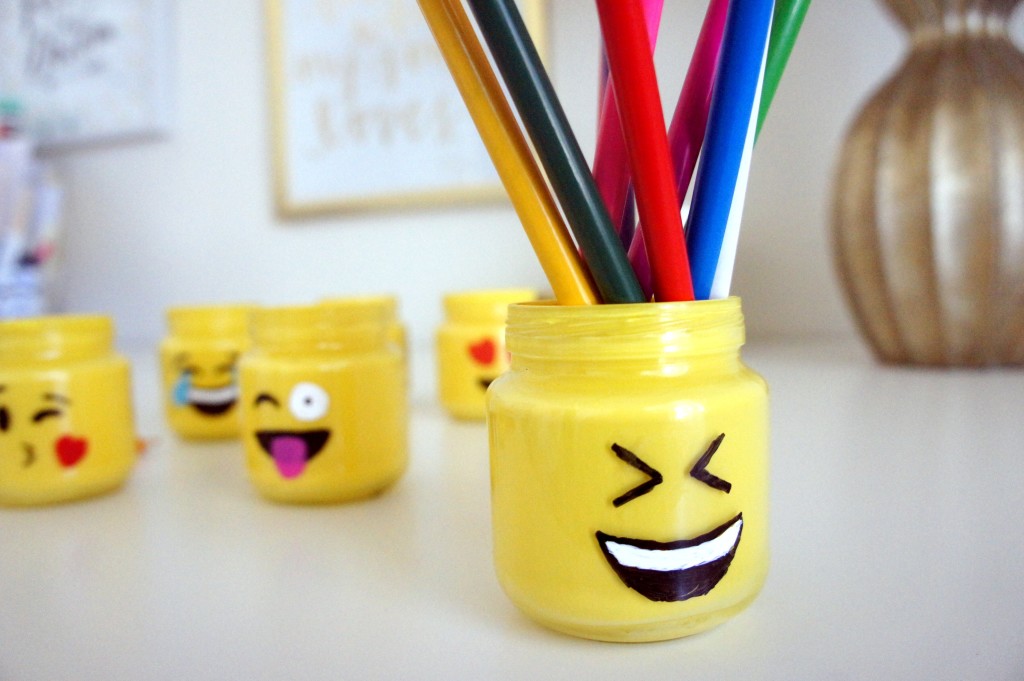
My love of emoji's has been a joke around our house and inspired this simple way to bring your favorite emoji's from your phone to your home with these adorable, emoji mason jars!

Tags: calendarcraftsdecorfarmhousemetalOfficerusticwoodwoodworking
32 Comments
0
Share

32 Comments

Leave your reply.
  • Roselynn Weaver
    · Reply

    May 26, 2016 at 6:17 AM

    Yes! I always fall in love with items and then get so sad when I see the price tag! This is so cute and I can think of so many people I want to make this for! Thanks for the easy to follow guide!! Xo, Roselynn
    http://www.thestylelynnkind.com

    • Lindsey
      · Reply

      June 7, 2016 at 11:18 AM

      Thank you so much, Roselynn!

  • Michelle Heath
    · Reply

    May 26, 2016 at 7:11 PM

    We are always trying to recreate things we see in the store. You did a wonderful job with this, and I’m going to be begging my husband to make one soon!

    • Lindsey
      · Reply

      June 7, 2016 at 11:18 AM

      haha! Thank you so much, Michelle!

  • Project Couture
    · Reply

    May 26, 2016 at 7:35 PM

    I’m not much of a DIY person but you made this look so fun and easy! It turned out beautiful, thanks for sharing.

    • Lindsey
      · Reply

      June 7, 2016 at 11:19 AM

      aww thank you!! Our goal is to always make our projects as easy and simple as possible – so hopefully anyone can try and recreate it! <3

  • Heather
    · Reply

    May 26, 2016 at 9:50 PM

    I’m definitely one of those that cringe when I look at some price tags on pieces I know I can make. However, I wish I had more time to make said projects. Great job on the calendar, John!

    • Lindsey
      · Reply

      June 7, 2016 at 11:19 AM

      I know exactly what you mean! Sometimes it is just worth buying it haha! Thank you so much, Heather!

  • Brittany Boone
    · Reply

    May 28, 2016 at 11:42 AM

    This is so fun and creative! I love it

    BNBstyling.com

    • Lindsey
      · Reply

      June 7, 2016 at 11:20 AM

      Thank you 🙂

  • Linh
    · Reply

    May 28, 2016 at 8:13 PM

    Absolutely LOVE this cute DIY! This might also be fun to do with special dates in our house like our girls’ birthdays or during the holidays like counting down the days to Christmas.
    -Linh

    • Lindsey
      · Reply

      June 7, 2016 at 11:20 AM

      OMGGGG I love that idea!!! Let me know if you make it, I would love to see pictures of how yours turns out!

  • Brittany
    · Reply

    May 28, 2016 at 8:47 PM

    This looks amazing! I LOVE Y’alls projects!!!!!!!

    • Lindsey
      · Reply

      June 7, 2016 at 11:20 AM

      You are SO sweet! Thank you so much girl!

  • Marianne
    · Reply

    May 28, 2016 at 8:55 PM

    I need one of these!

    • Lindsey
      · Reply

      June 7, 2016 at 11:21 AM

      Thank you! I just love it!

  • Amy G.
    · Reply

    May 29, 2016 at 6:47 AM

    I love it! You are so crafty and handy. There are so many occasions I don’t buy things because of the price tag. Sometimes I’m willing to try it myself, but a lot of time making it seems daunting. You make it look easy!

  • Wendy
    · Reply

    May 29, 2016 at 8:27 AM

    I know what you mean, I’ll go in stores and be like, “hey! this probably costs $20.” Yet it’s like $300 lol. This looks amazing and so creative! I love the last photo – I love having a seeing monochrome tones.

    • Lindsey
      · Reply

      June 7, 2016 at 11:24 AM

      That is the worst! haha! We do that all the time LOL. Thank you so much! I’m hoping to get an office tour up soon 🙂 This is the first time we have had room for my own office and I wanted it to be a clean and peaceful working space 🙂

  • Catherine | Fit Armadillo
    · Reply

    May 29, 2016 at 9:15 PM

    WOW! I absolutely love it. Thanks for sharing your process and idea with us 🙂

    • Lindsey
      · Reply

      June 7, 2016 at 11:24 AM

      Thank you so much, Catherine!

  • Nikki
    · Reply

    May 30, 2016 at 10:07 AM

    This turned out seriously awesome!! Perfect DIY!

    • Lindsey
      · Reply

      June 7, 2016 at 11:25 AM

      you are so sweet! Thank you!

  • Elly
    · Reply

    May 30, 2016 at 8:47 PM

    I just love love this! It’s so easy to make too!

    • Lindsey
      · Reply

      June 7, 2016 at 11:17 AM

      Thank you, Elly! Yes, it totally is!

    • Lindsey
      · Reply

      June 7, 2016 at 11:25 AM

      Thanks, Elly! Yes, it totally is! I just love it. I feel like it will be a staple piece that I always use in my home decor.

  • Nicole
    · Reply

    May 30, 2016 at 9:23 PM

    What a neat project!

    • Lindsey
      · Reply

      June 7, 2016 at 11:16 AM

      Thank you!!

    • Lindsey
      · Reply

      June 7, 2016 at 11:26 AM

      Thanks girl! <3

  • Naomi Trevino
    · Reply

    June 2, 2016 at 7:43 AM

    You are so talented. This is super cute.

    • Lindsey
      · Reply

      June 7, 2016 at 11:16 AM

      Thank you!! I really appreciate it!

    • Lindsey
      · Reply

      June 7, 2016 at 11:26 AM

      Thank you, Naomi!

Leave a Reply

Your email is safe with us.
Cancel Reply

Meet The Lyons

Subscribe

Latest Posts

  • Rustic Wooden Calendar Weekend Getaway to Fredericksburg: John and I planned a little...
    Read More
  • DIY Wine Journal & Recap of H-E-B Wine Walk One thing I love about The Woodlands/Houston is all of...
    Read More
  • Summer is Here! Summer is here! & man, do I love Summer time....
    Read More
  • Summertime Peach Rose Tarts A sweet summer treat to kick off the season, these...
    Read More

Instagram

  • Its been about two months since I have checked onhellip
  • Sipping my first psl of the season  living vicariouslyhellip
  • Today might as well be a holiday in our littlehellip
  • Its 62 degrees today in Dallas  I am lovinghellip
  • Can we just fast forward to the weekend already?!? Thehellip
  • Sippin pecan coffee this morning  scrolling back through photoshellip
  • We had the BEST weekend in fredericksburg we stayed athellip
  • My uniform lately I am all about casual comfy hellip
  • Kinda loving this simple little gallery wall in our livinghellip

Contact Us

Send Message

© 2017 — Our Messy Table. Privacy Policy / Disclosure
Created with in London, UK.

Prev Next

Search

Blog Categories

  • 30 Before 30
  • Coffee Conversations
  • Décor
  • DIY
  • Entertaining
  • Happy Hour
  • Meals
  • Spring
  • Style & Beauty
  • Summer
  • Sweet Treats

Tags

beauty breakfast brunch centerpiece christmas cocktail craft crafts date night decor dessert dinner DIY dress drinks entertaining fall favorites Francesca's happy hour holiday holidays home Home Decor home tour hosting kendra scott lunch mixed drink Office ootd our messy table recipe side dish snack spring style summer sweet target thanksgiving trend valentines day winter wreath

Type and press Enter to search

Never Miss A Post
Subscribe to Our Messy Table & get post updates to your inbox!
SUBSCRIBE NOW!
Your Information will never be shared with any third party.
×